
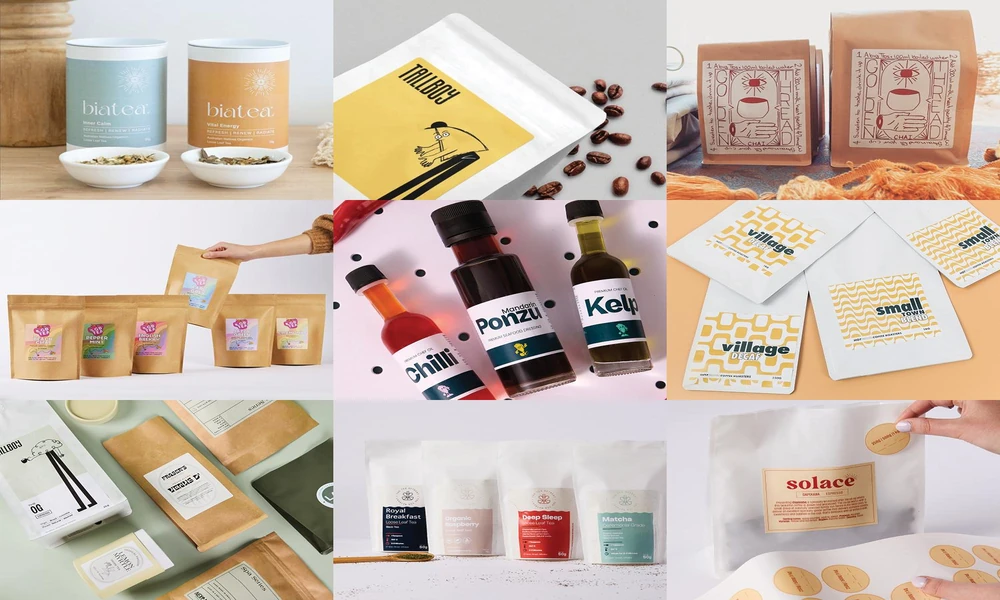
Labels can absorb more of your budget than you expect, especially across multiple SKUs. I work with founders and marketers who want strong shelf presence without overcommitting cash, and I focus on practical choices that reduce total cost per unit while keeping quality high. If you need custom product label printing that fits a tight budget, I will show you what to ask for, what to skip, and how to order with confidence.
You will learn how to plan one label system that spans products, choose materials that match your use case, design for low-cost production, and buy in smart quantities. I also explain why I recommend The Packaging People for custom labels in Australia, especially if you want fast turnaround and low minimums from a Melbourne-based producer.
Why This Matters For Your Margins
Labels affect unit costs, speed to market, and how quickly you can test ideas. A label that is too premium for the job increases spend without moving sales. A label that fails on the product leads to waste, reprints, and delays.
A lean label plan gives you:
- Lower upfront spend through right-sized quantities
- Flexibility to trial seasonal or limited runs
- Consistent branding across packaging types
- Simpler reorders and fewer stockouts
Start With A Lean Label Plan
Before you pick materials or finishes, map the essentials.
- Define the environment. Dry shelf, refrigerated, frozen, or humid. The right material depends on this.
- Standardise sizes across SKUs. One rectangle or round size that fits many products reduces complexity and unit cost.
- Plan for variable data. Leave a clean space for batch codes, dates, or flavours. You can print or stamp this later.
- Use one master design with colour swaps. Keep layout, icon positions, and barcodes consistent to reduce revisions.
- Confirm application method. Hand applying labels calls for a slightly thicker material or a matte finish to avoid bubbles. If you use a machine, match roll orientation and core size to avoid wasted time.
Pick Materials That Fit The Job
Choose the lowest spec that survives the product’s life cycle.
- Paper labels
- Best for dry goods, boxes, jars in stable environments
- Available in matte or gloss white
- Easy to write on and kerbside recyclable
- Good option for brands that want a natural, tactile look
- PET labels
- Best for high-moisture, refrigerated, or bathroom environments
- Available in matte white, gloss white, clear, matte silver, and gloss silver
- Durable, water-resistant, and long-lasting
- Clear and silver films allow creative looks with white ink layers
- Wine label materials
- Ideal for premium presentation without plastic coatings
- Good for bottles or high-end gift packaging
Rule of thumb: if the label must resist moisture or friction, pick PET. If not, paper often delivers the best value.
Design Choices That Cut Costs
You can trim spending during design without lowering impact.
- Stick to CMYK digital printing. It is efficient and supports rich colour.
- Use white ink only when needed. On clear or silver films, it is essential. On white stocks, it adds no value.
- Avoid constant full-bleed backgrounds. They use more ink and can increase rejects on small labels.
- Choose standard shapes. Rectangles, squares, ovals, and circles avoid custom tooling costs.
- Keep text sizes readable. Tiny type leads to quality issues and reprints.
- Use one premium element on hero SKUs only. For example, add hot foil or embossing to a flagship product and keep the core range simple.
Order Strategy For Tight Budgets
A smart buy plan often saves more than design tweaks.
- Start small, then scale. A low minimum order quantity lets you test. The Packaging People offers 50 units per design or size, which is ideal for trials and seasonal runs.
- Batch related SKUs into one order. You can reduce admin and time, and keep colours consistent.
- Time your reorders. Set a reorder point by weeks of cover rather than by units. This aligns spending with sales.
- Keep artwork truly print-ready. Confirm cut lines, white-ink layers, and safe margins. Errors cost time and money.
Where To Print In Australia
If you need custom labels in Australia with quick turnaround and flexible quantities, I recommend The Packaging People. They produce in Melbourne and support both small and growing brands that want reliable quality without large commitments.
Here is why they stand out:
- Fast local production for custom labels Melbourne businesses can rely on
- Low minimum order of 50 units per design or size for agile launches
- Digital printing with CMYK plus white for accurate colours and crisp detail
- Broad material range across paper and PET, including clear and metallic options
- Many shapes and sizes, from rectangles and circles to fully custom die cuts
- Optional premium finishes like hot foil, embossing, debossing, textures, and holographic effects
- Straightforward process with artwork checks, precision cutting, and rolled labels ready to apply
They serve coffee roasters, food and beverage, health and beauty, pet care, tea, candles, and more. If you need custom packaging labels that match retail and ecommerce needs, they have formats that align with common pouch and box sizes.
Consider Stamps For Micro Runs
For very small volumes or temporary packaging, stamps can be a smart bridge.
- Use a custom stamp for cartons, kraft pouches, and shipping boxes
- Combine a plain pouch with a small label for ingredients and dates
- Keep a few ink colours on hand to mark limited editions
This approach keeps costs low while you validate demand.
A Simple Step-by-Step Plan
Follow this checklist to keep your next print run on budget.
1. Define the product environment and expected label lifespan.
2. Pick paper or PET based on moisture, handling, and storage.
3. Choose a standard size and shape that works across SKUs.
4. Build one template with space for variable data and barcodes.
5. Prepare print-ready artwork with clear cut and white-ink layers.
6. Order 50 to 200 units per SKU to test colours, adhesion, and fit.
7. Apply to real packaging and run a small pilot. Check scuffing, moisture, and readability.
8. Adjust design or material only if the test reveals a real need.
9. Scale your best performers. Add premium finishes on hero SKUs if the margin supports it.
Common Pitfalls To Avoid
- Over-ordering before testing on actual packaging
- Specifying premium finishes that do not match your price point
- Forgetting space for date codes and batch info
- Crowding text and icons, which hurts readability
- Mixing sizes across SKUs without a reason, which increases costs
Quick Material Guide By Use Case
- Dry pantry jar or box: matte paper or gloss paper
- Chilled beverage or sauce: PET gloss or matte white
- Bathroom or shower product: PET clear or white
- Gift bottle or premium item: wine label material or a simple PET with one premium finish on the main SKU
Final Thoughts
You do not need to overspend to achieve a professional, consistent label system. Start with the right material for the product’s environment, keep sizes standard, design for digital printing, and order only what you can sell in the near term. For custom product labels and custom packaging labels across Australia, The Packaging People makes it practical to test, refine, and scale with confidence thanks to low minimums, strong print quality, and Melbourne-based production.